Saturday, April 30, 2011

Chairs To You Stamp of the Month Blog Hop


Welcome to our March Stamp of the Month Blog Hop! We are featuring D1456 Chairs To You!, a set of 10 absolutely adorable stamps!

If you have come here from Helen Onulak's Blog, you are on the right path!  You can find a list of all the partipant's in case you get lost here: http://bowlofstamps.blogspot.com/p/sotm-blog-hop-list.html

This month we have nearly 60 Close To My Heart Consultants sharing their creations using this month's SOTM and other great CTMH products on their blogs. This is simple to do - just click on the link at the end of the post on each blog to move to the next one! Here we go!

Now "Hop" on over to Katy Donaldson's Blog to see her beautiful eye candy! Be sure to visit all the Consultants at their Blogs to get some great crafting ideas and other fun ideas! Remember, the SOTM is only available until May 31st!  Contact your CTMH Consultant (or click here) to see how you can get this stamp set at a discount or even free!

* * *
Below is one of the ways I decided to use this stamp set.  It is an 3.5" x 8" card.  I have paper pieced the chairs and little flowers with cranberry cardstock.  Yes, those little flowers were not easy! Also note that you can click on the picture to see details.

Below is a closer look at the paper piecing:


Supplies:  Chairs To You! Stamp Set; Cranberry, Cocoa, Kraft & White Daisy cardstocks, Cocoa Exclusive Inks, white mini ricrac; Bitty Brad Assortments and pewter MyAccents (retired).


How'd She Do That?

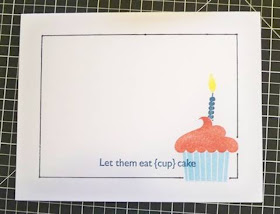
This is just a quick how-to post.  I had a couple of people ask how to get the frame around the cards from the post below--Birthday Card Workshop.  The answer is that I made a template.

Here is what you do (note that you can click on any picture to make it larger to see details):

1.  Whatever size card you are making, cut out two pieces of cardstock (for strength) the same size as the card you wish to frame.  For the Fanfare cards in my previous post, they were all "standard - A2" (or 4-1/4" x 5-1/2").  So I used some retired color (ocean) pieces of cardstock.


2.  Knowing that I wanted at least a half inch margin around the card, I used my paper cutter to cut out the inside of the pieces I created in step 1 (see pictures below which can also be clicked on show more detail) . 


3.  Glue the two frames together.  After you have stamped your card, place the frame over the card and trace around the inside of the frame up to where the stamped image.

4.  By using a frame that is the same size as the card you are framing with a border, you always insure that everything will be centered perfectly.


Voila!

Thursday, April 14, 2011

Birthday Card Workshop

I can't wait until this Saturday for my April workshop.  We are going to be making a set of Birthday cards along with a little A2 Slant Lid Box to hold the cards.  The box is a template created by the incredibly talented CTMH consultant Vicki Wizniuk.  The fun thing I like about this workshop is that the birthday cards are one layer and quick to assemble.  The Fanfare Workshop On the Go is such a FUN kit and I just love the stamp set that goes with it.  It is SO versatile!  I have to give thanks on the cards to equally creative and talented CTMH consultants Melinda Everitt and Katy Donaldson--who had the original idea for some of these darling cards!  Well, here is what we will be doing:

The kit showing a couple of the envelopes:

Next is a closer look at some of the cards:


Another with a close up of the card box:


And one with it's envelope:

These were so quick and easy, I'm thinking of adding maybe another card.  I hate to have the workshop get over too fast because it is also my monthly dose of getting together and socializing with some fabulous friends!

Happy Friday to everyone!